
Creating a multi-boot installer for macOS involves several steps. Here’s a general outline of the process:
1. Obtain macOS installation files: Download the macOS installation files for each version you want to include in the multi-boot installer. These can be obtained from the Mac App Store or other authorized sources.
2. Prepare USB drive: You will need separate partitions on the USB drives for each macOS version. Make sure the drives have sufficient capacity to accommodate the installation files.
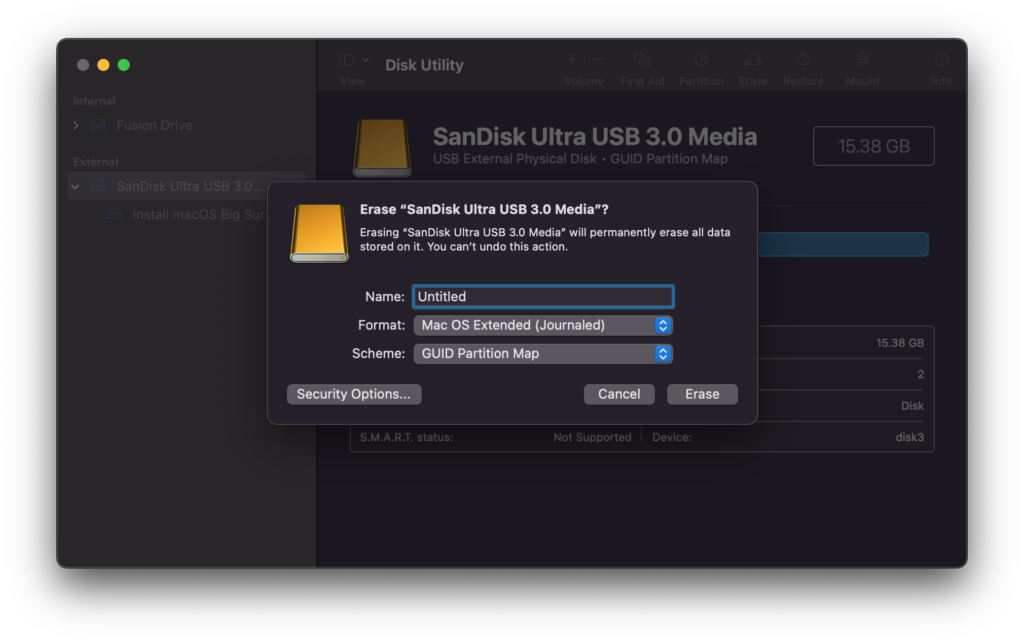
3. Format the USB drive: Connect USB drive to your Mac and open the Disk Utility app. Select the USB drive and choose “Erase.” Format them as “Mac OS Extended (Journaled)” and give them appropriate name.
Note:
You can also use the terminal commands to create the first installer, it will completely erase the disk and create the necessary partitions and it will ensure that the USB disk is properly formatted and it will become bootable then you can skip step 3 and go to step 4 instead.
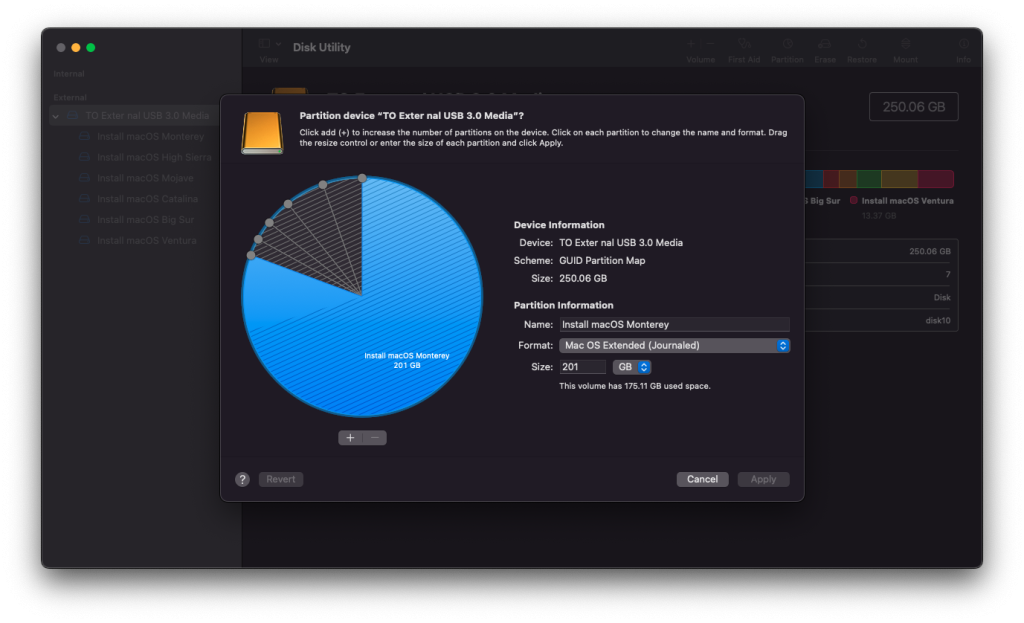
4. Partition the disk: Select Partition and for each macOS installer you want to use create a separate partition with at least 12 to 16 GB for more recent macOS versions like macOS Ventura, Monterey and Big Sur and for older versions of macOS like macOS Catalina, Mojave etc. you can create smaller partitions with at least 6 to 10 GB.
Add partitions one at the time so you won’t get into any issues.
5. Create bootable installers: Use the ISO Image Creator app to create the bootable ISO files for each macOS Installer you want to use on the multi-boot USB disk.
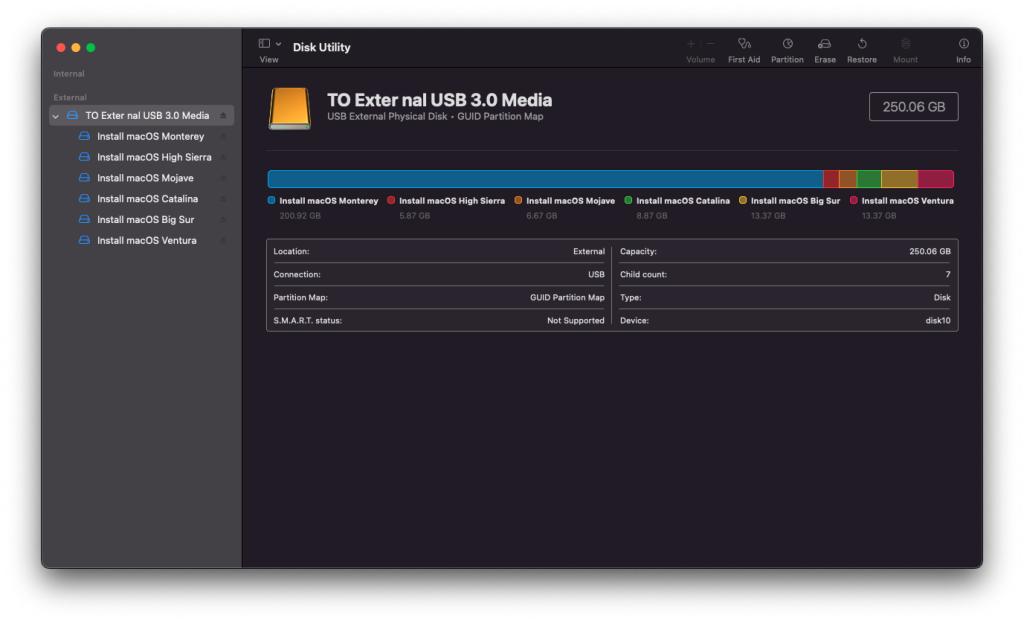
6. Repeat the process: Repeat step 5 for each macOS version you want to include in the bootable usb installer, using the corresponding partition and macOS installation files.
8. Copy the bootable installers: Mount each ISO image that you’ve just created and press command+shit+. to show all the invisible files in the ISO image and then select all the files by pressing command+a and then copy them to the corresponding partition.
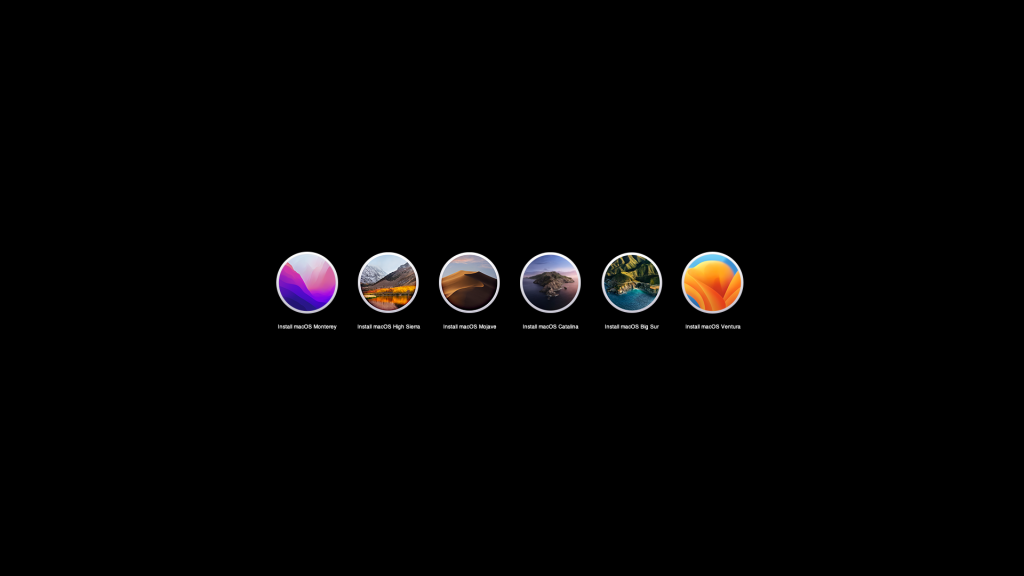
7. Test the bootable installers: Restart your Mac and hold down the Option key to access the boot menu. Verify that each USB drive appears as a bootable option. You can select a drive and proceed with the installation to ensure it works correctly.
8. Finalize the multi-boot installer: Once you’ve verified that all the bootable installers work, you have made a single USB drive or external storage device with multiple macOS installers.
9. Test the multi-boot installer: Restart your Mac and hold down the Option key to access the boot menu. Ensure that the multi-boot installer appears as a bootable option. Select it and choose the desired macOS version to proceed with the installation.
Remember to always have appropriate backups of your important data before attempting any installations or modifications to your system.
Here’s an estimate for each macOS installer partition size, These sizes might be different depending on the versions of macOS installers:
| macOS Sonoma | 15 GB |
| macOS Ventura | 15 GB |
| macOS Monterey | 15 GB |
| macOS Big Sur | 13.5 GB |
| macOS Catalina | 9 GB |
| macOS Mojave | 7 GB |
| macOS High Sierra | 6 GB |
| macOS Sierra | 5.5 GB |
| Mac OS X El Capitan | 6.5 GB |
| Mac OS X Yosemite | 6.5 GB |
| Mac OS X Mavericks | 5.5 GB |