Many of us use Time Machine as a backup strategy for our Mac. I've been using it for as long as Apple introduced it back in 2007.
But ever since macOS Big Sur Apple revamped Time Machine to improve APFS support and if you use a hard disk for Time Machine it will lock the whole disk for unauthorized access which makes it safer and more tamper proof, but there is a down side to it. You can't manually copy files and folders to the disk.
There is a simple work around to be able to use the extra space on your Time Machine backup disk if you need.
Let's see what changed since macOS Big Sur and how get around this issue for a bit.
APFS (Apple File System) was designed by Apple to fix some core issues with its predecessor Apple HFS and it stores data in a completely different structure. There's an APFS container which contains the information of the Volumes and each container can contain one or more volumes.
No let's get back to the issue, when you chose a disk as the Time Machine backup when Time Machine formats the disk and creates the main container and the volume it will be locked and only Time Machine have access to that volume, all you need to do is to open Disk Utility and select the Time Machine disk and add another volume so you can have write access.
- Select the Time Machine disk's container from the left side bar in Disk Utility. By default disk utility only shows the volumes not the disks, use command+2 hot key or click on "View" icon on the toolbar to enable "Show All Devices"
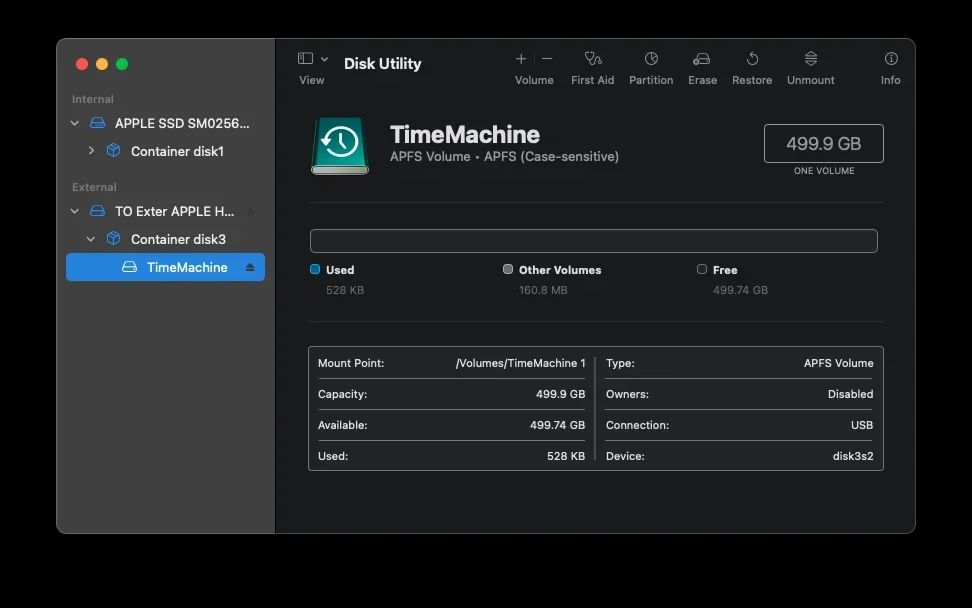
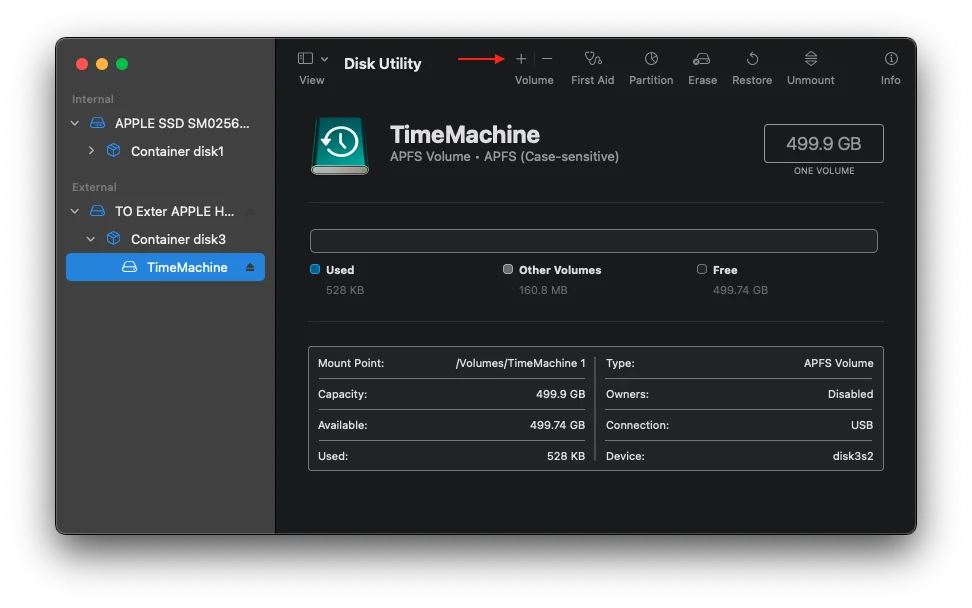
2. Click the + icon on the toolbar on top of the Volume to add a new APFS volume
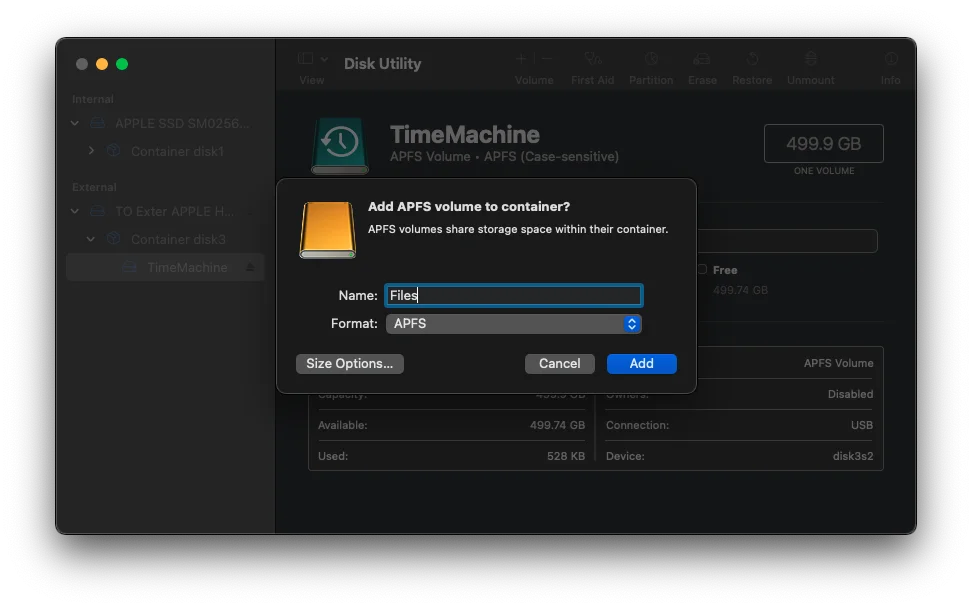
3. Type in the name for the new volume and select the APFS format. By default the format is set to APFS (Case-sensitive) so change it to APFS so you can copy or make normal files and folders
4. Once the process is done click "Done" and your new APFS volume is ready to use.
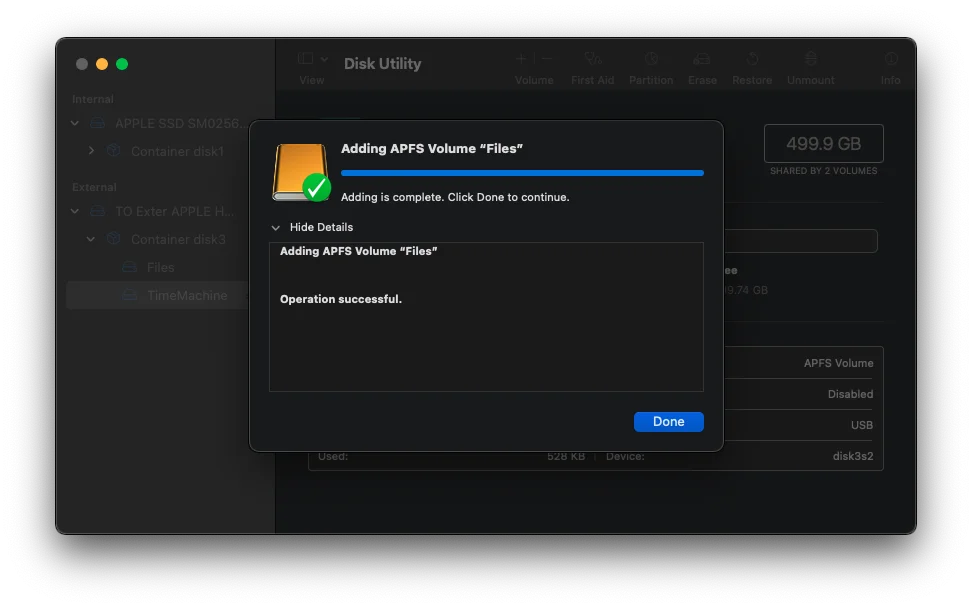
5. Notice the differences between these to folders, the Time Machine has a small icon in the status bar which indicates no write access and the new volume doesn't have that icon so you can write files and folders to it.
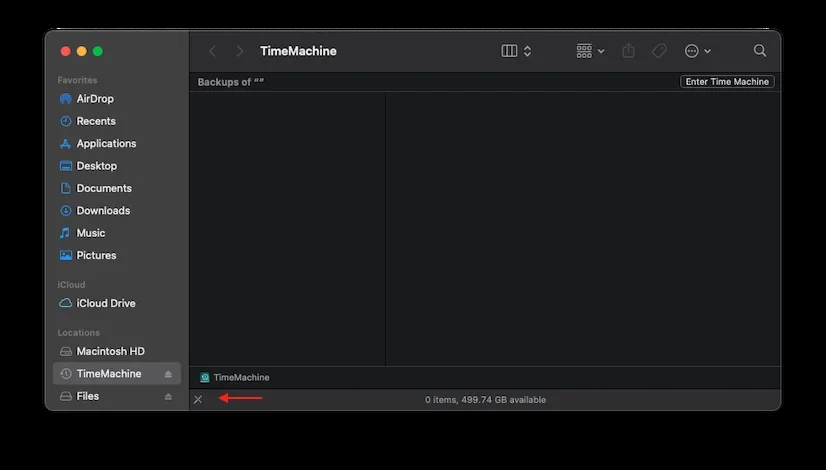
No write access to this volume
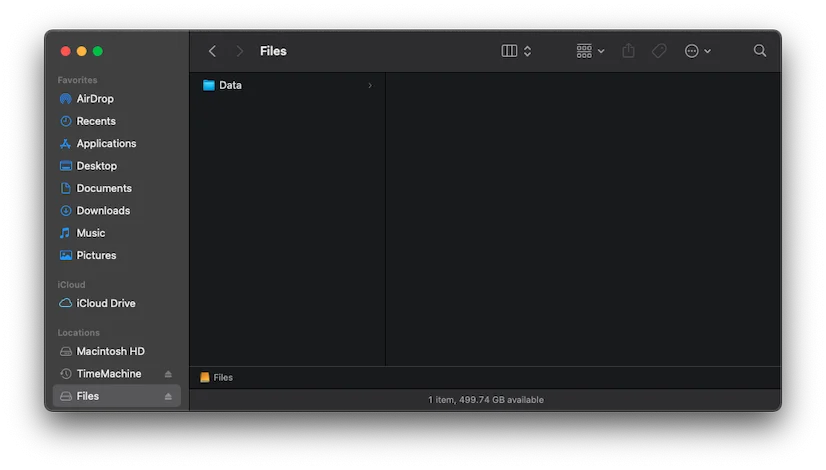
You have write access to the new volume